워드프레스는 기본 용량 3기가를 제공한다. 사진 사이즈만 잘 조절한다면 보통 한장에 500-600KB (사진 크기는 900px 이상)이다.
3GB = 3145728 KB
3145728KB / 500KB = 대략 6291 개의 사진을 업로드할 수 있는 용량이다.
그러나 우리는 잘못된 세팅으로 인해 금방 3GB를 소진할 수 있다.
팁 1. 워드프레스 앱(JetPack)에서 사진 업로드 설정하기
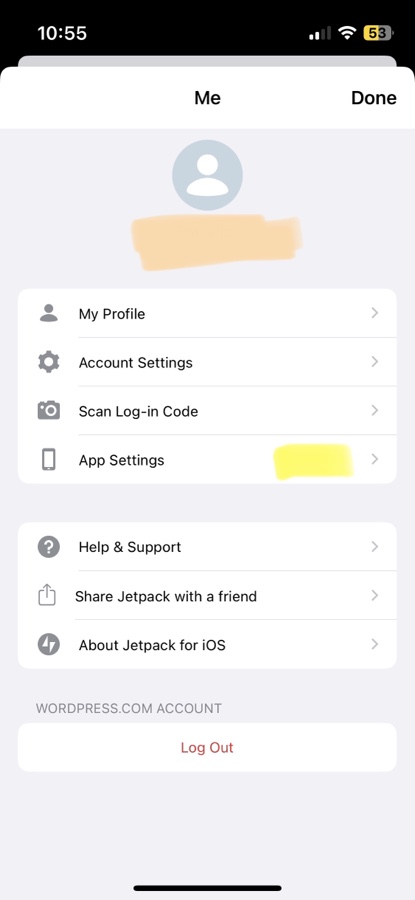
우측 상단 프로필 이미지 선택하면 세팅 메뉴가 나온다
App Setting을 선택하자
위에 메뉴에서 첫 번째 두번째를 보면 이미지 용량 및 비디오 사이즈를 선택할 수 있다. 이미지는 900으로설정하고 비디오는 480으로 설정하자. 그러면 앱에서 사진 올릴때 사진 및 비디오가 원본으로 업로드 되지 않기 때문에 획기적으로 줄일 수 있다
팁 2, 구글 포토를 이용하자
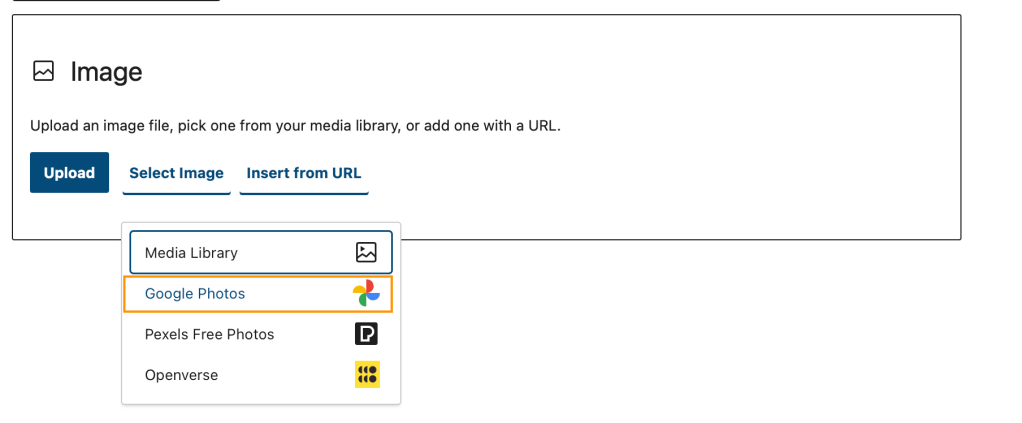
이 방법은 앱이 아닌 웹 브라우저로 워드프레스 사이트로 들어가서 포스팅 하는 경우에만 가능하다. 사진 블록에서 미디어 라이브러리가 아닌 구글 포토를 선택하자.
만약 구글 계정 연결이 안되어있다면 연결하라는 팝업이 뜰 것이다. 아무튼 연결하자. 그러면 구글 포토에 올린 사진을 선택해서 워드프레스 블로그 포스팅을 계속 할 수 있다. 이렇게 선택된 사진은 워드프레스 자체 사진첩 용량을 소모하지 않기 때문에 비용을 아낄 수 있다.
팁 3, 블로그에 첨부하지 않은 사진을 필터링해서 삭제하자
주의! 이 방법은 블로그 글을 작성할때 이미지 블록을 이용해서 사진을 편집 상태에서 직접 올린 경우에만 해당됨. 다시말해 미리 사진을 여러장 워드프레스 갤러리에 업로드 해놓고 나중에 글 작성할때 미디어 라이브러리에서 선택한 경우에는 이방법을 이용하면 블로그 포스팅에 포함된 사진이 삭제될 수 있음.
워드프레스 어드민으로 들어가서 미디어를 선택하고 우측 상단에 보기에서 클래식 보기를 선택
위와 같이 필터 옵션에서 Unattached를 선택하고 우측에 필터 버튼을 클릭하자
그러면 포스팅에 포함되지 않은 지워도 되는 사진들이 쭉 나올 것이다. 이 사진들을 삭제해버리자.
This post I’ll introduce static analyzer tool for checking the unused swift codes
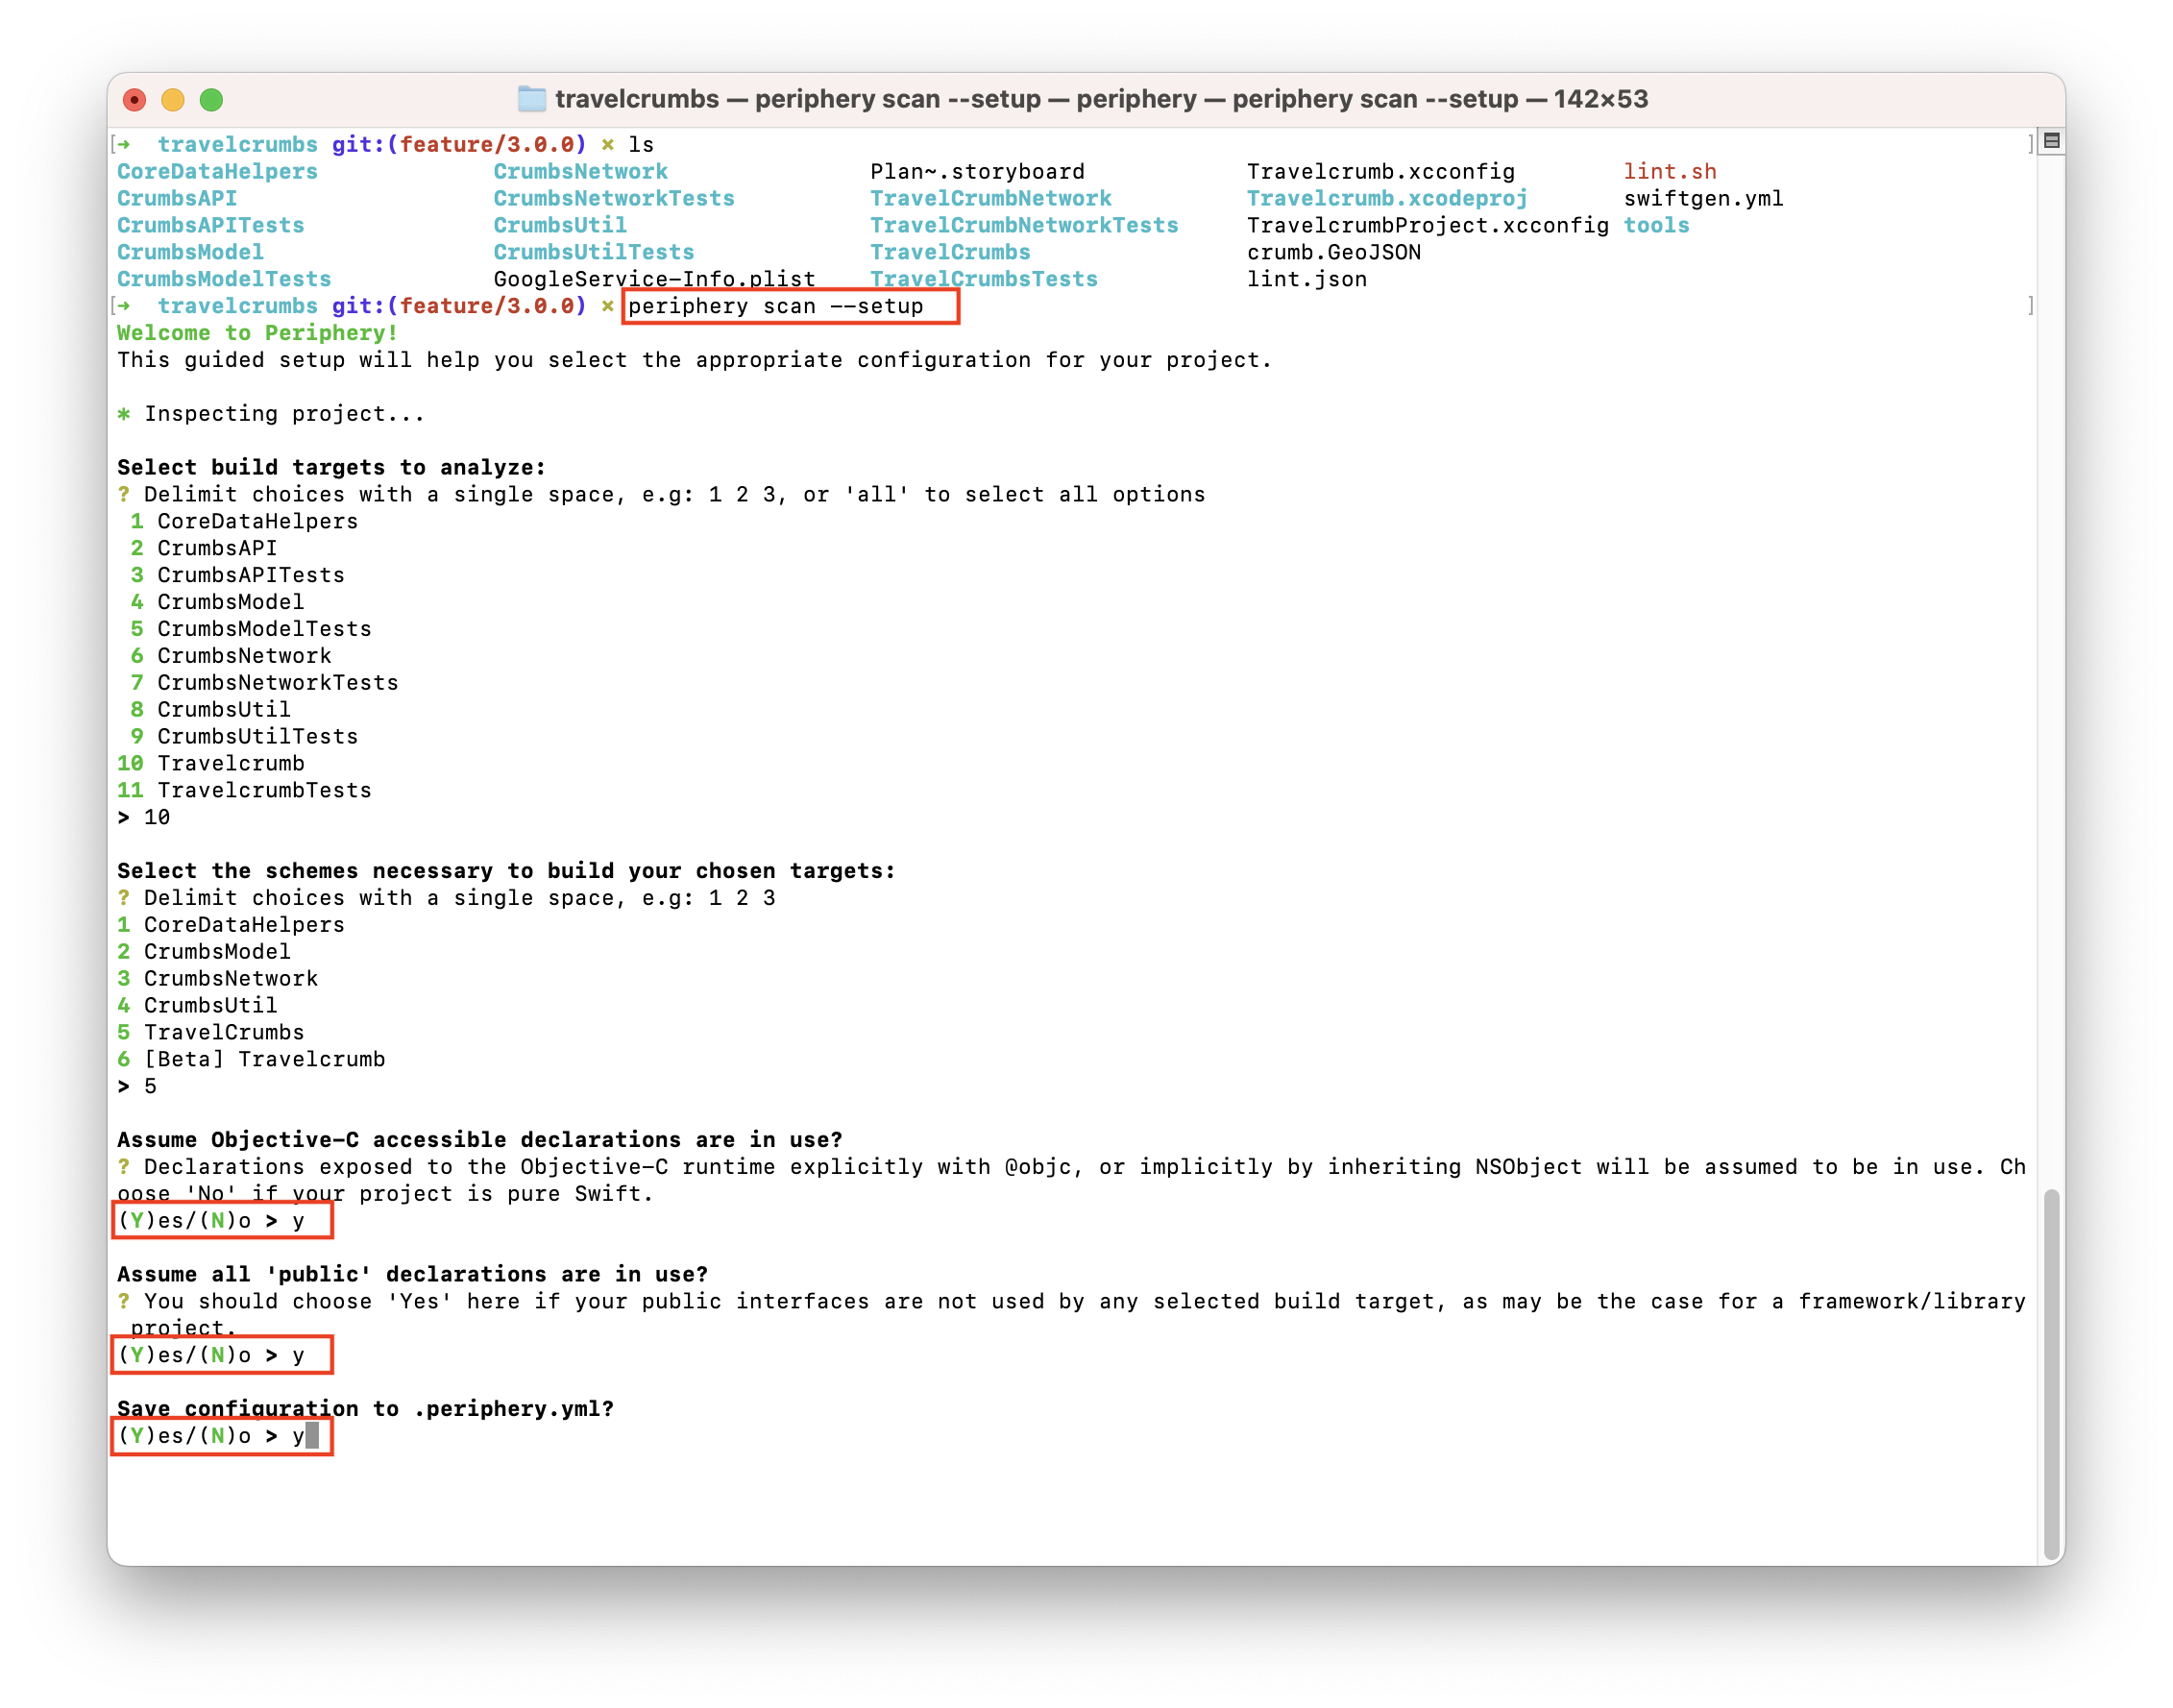
Install Periphery
Link You can install periphery tool using homebrew
Here is homebrew install command.
brew install peripheryapp/periphery/periphery
And then setup peripheryapp on your project
periphery scan --setup
Select your App’s target name. Don’t forget to save configuration to .periphery.yml
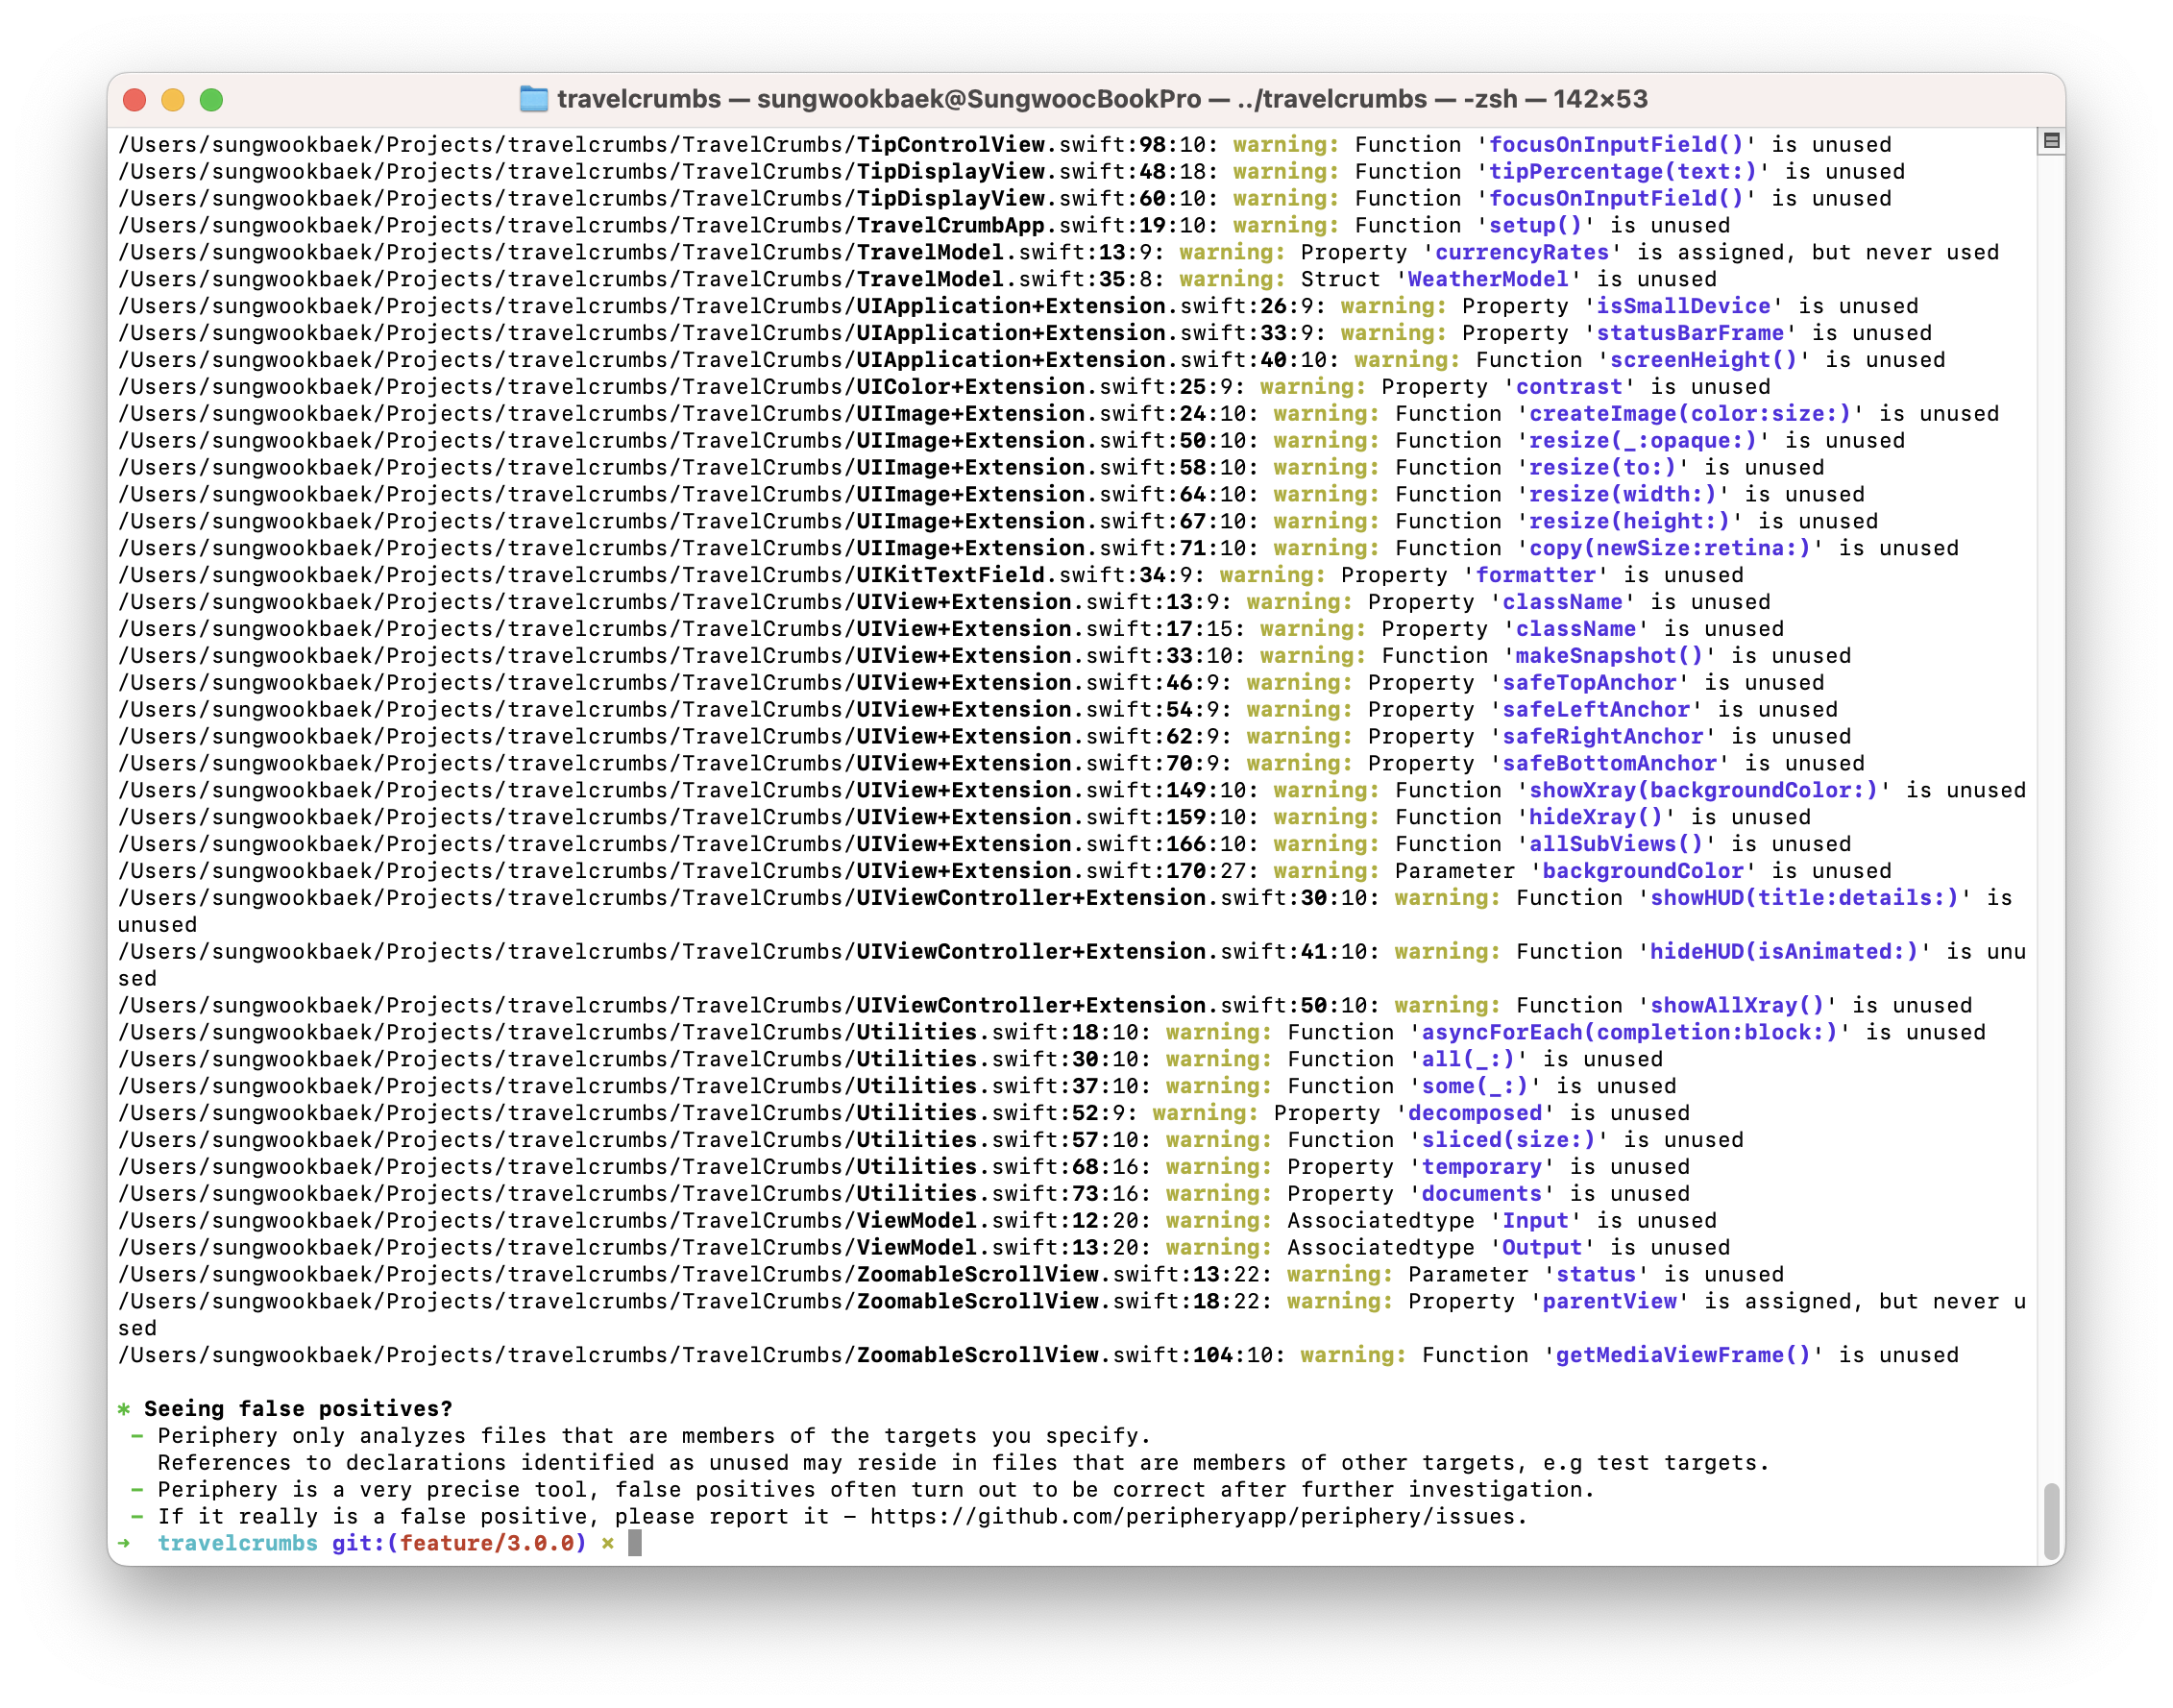
Check unused codes
You can see the results.
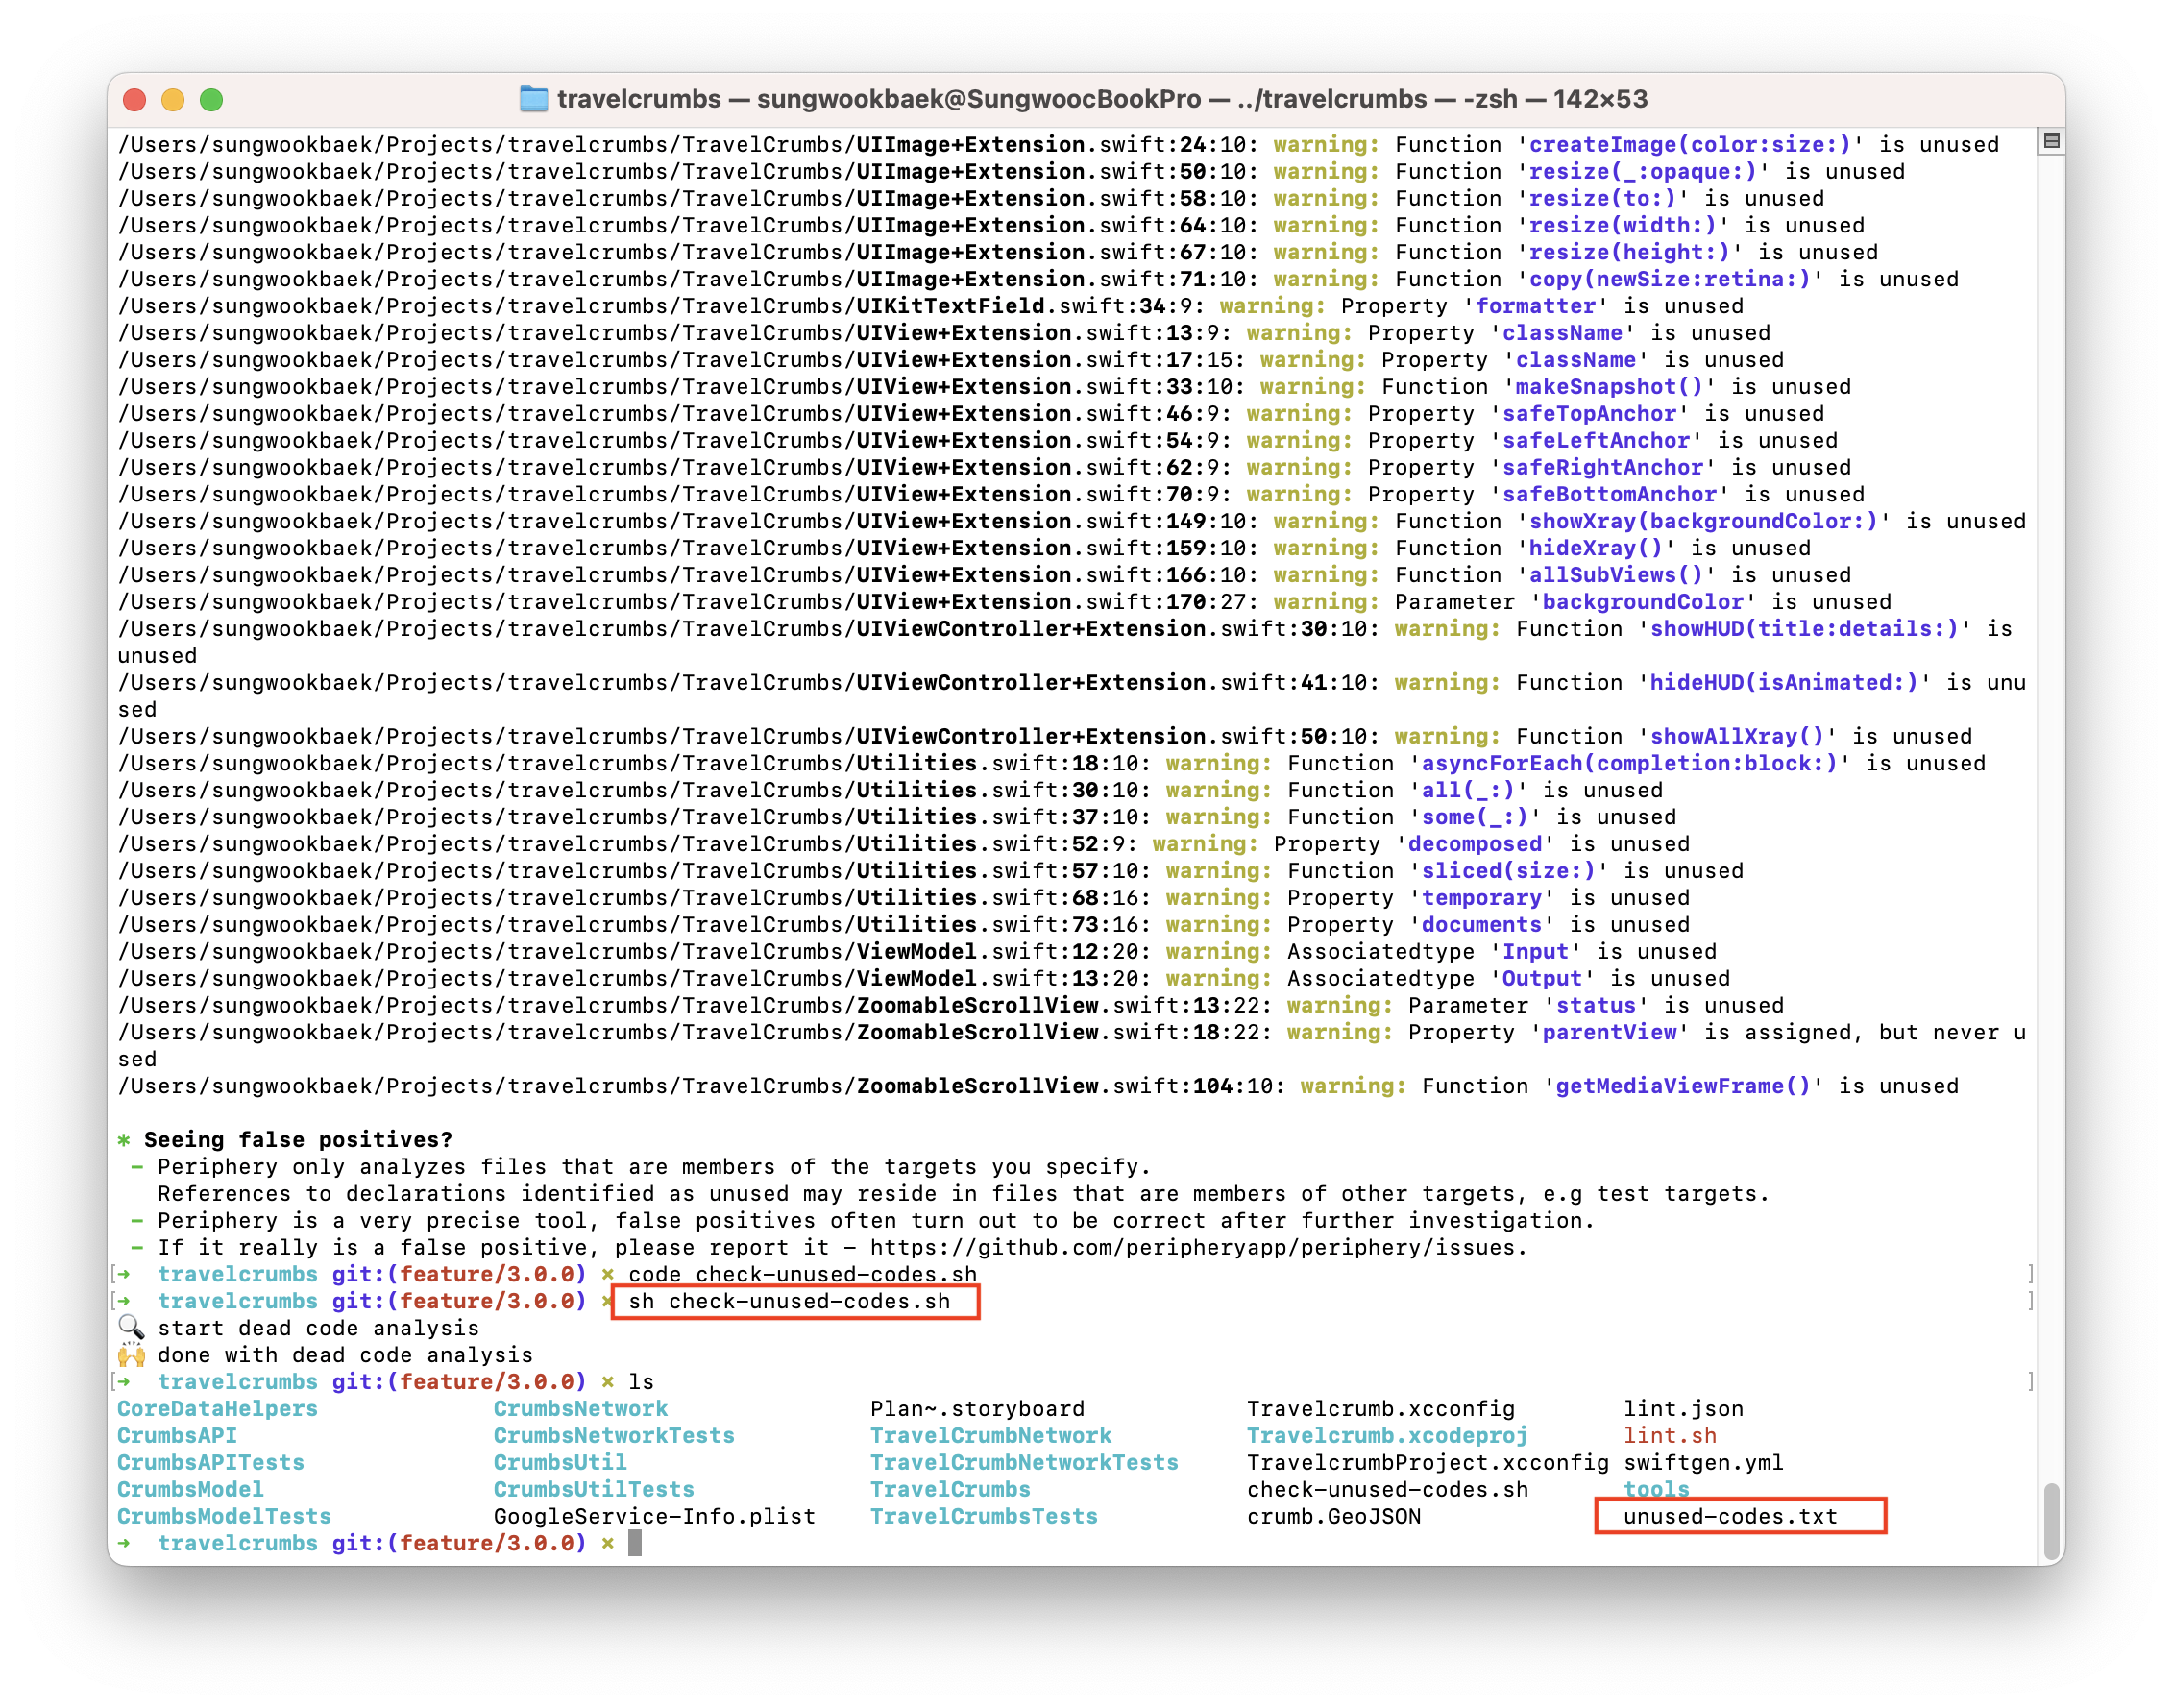
Make a script file to save result as text file
I recommend make a bash script file to save results as text file to keep track progress of reducing unused codes. Here is the bash script. (I changed ruby code (https://www.youtube.com/watch?v=2OQiCj-BG2o) to bash script)
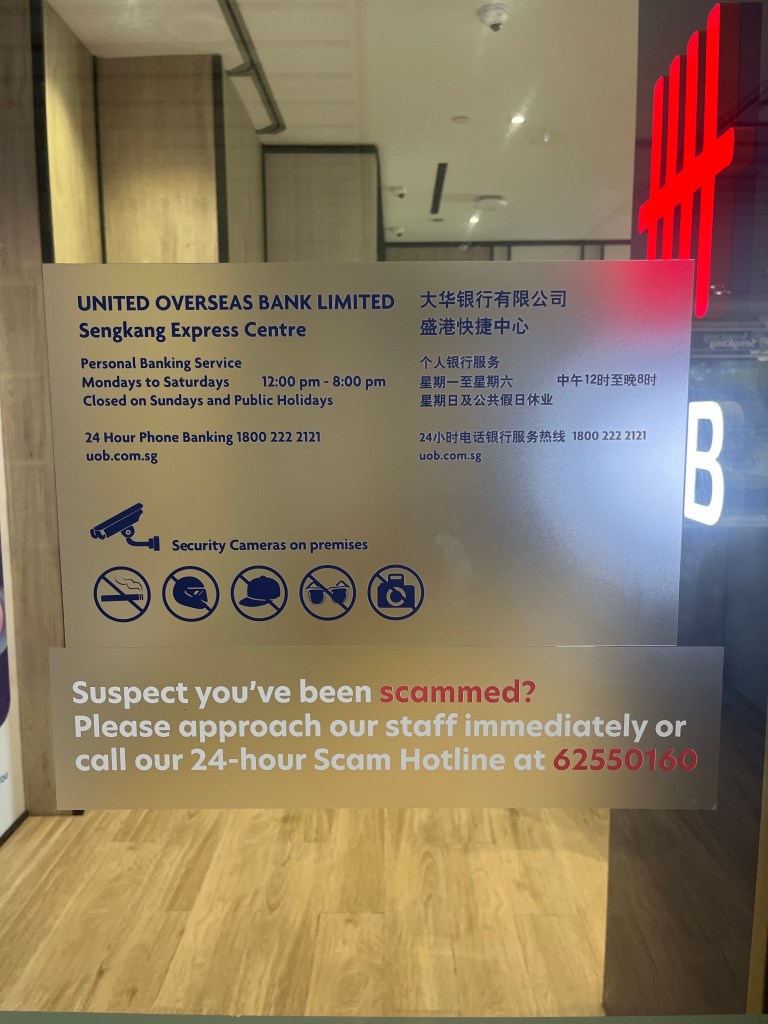
I use UOB debit card, one day I opened bank app and I found a scam transaction.
Someone used my debit card in USA and Canada (it almost 1000 USD) also My balance also deducted.
I’m so stressed because that day is I have to send money to my home owner for rent.
I reported it to HR team first and He guided me
Process
Fist, Do report it to police
I asked why you guide me for reporting it to police first? He said that bank will more pay attention to you once you made a report it police
Can report it onlice
Second, Call Scam hotline
Fortunately I can talk with scam manager at midnight.
What’s the next?
A manager blocked my debit card and reissued it. He said that It take around 7-10 working day to get my money. Sometimes take more time (1 month)
Thought about it
I issued debit card not a credit card to use money seriously. But after this issue, I changed my mind. Credit card is better because it can control the status of payment and cancel it. But Debit card cannot. If someone already use my card then It affect my balance too.
To get my money, It take too long time. That’s not make sense!
At City Commuter App, we are committed to protecting the privacy of our users. This privacy policy explains the types of information we do not collect, how we use the information we do not collect, and the steps we take to protect it.
Information We Do Not Collect
Personal information: We do not collect any personal information from our users such as names, email addresses, or contact information.
Usage information: We do not collect any information about how our users use our app, such as the features accessed or actions taken.
Device information: We do not collect any information about the devices used to access our app, such as the model, operating system, or screen resolution.
Use of Information
We do not collect any information from our users, so we do not use any information for any purposes.
Sharing Information
We do not collect any information from our users, so we do not share any information with third parties.
Changes to Our Privacy Policy
We may update this privacy policy from time to time to reflect changes to our information practices. We will notify you of any changes by posting the new privacy policy on this page.
Contact Us
If you have any questions or concerns about our privacy policy, please contact us at shawn@shawnbaek.com
Please note that this is a sample privacy policy, but as you said your app doesn’t collect any user data, you don’t have to share anything about data collection. However, it’s always a good idea to have a privacy policy in place to inform users about your app’s data practices and to give them peace of mind.
Here is a simple swift code for checking execution time. (main.swift)
import Foundation
func sum(from: Int, to: Int) -> Int {
    var result = 0
    for i in from...to {
        result += i
    }
    return result
}

let startTime = Date()
let result = sum(from: 1, to: 10000000)
let endTime = Date()

print("Result: \(result)")
print("Calculation Time: \(endTime.timeIntervalSince(startTime)) seconds")
swiftc -O main.swift is generating executable file. It is not a human readable file. The optimization process transforms the source code into machine code, which is the binary code that can be executed directly by the computer.
Do you want to see the intermediate representation of the Swift code generated during the optimization process?
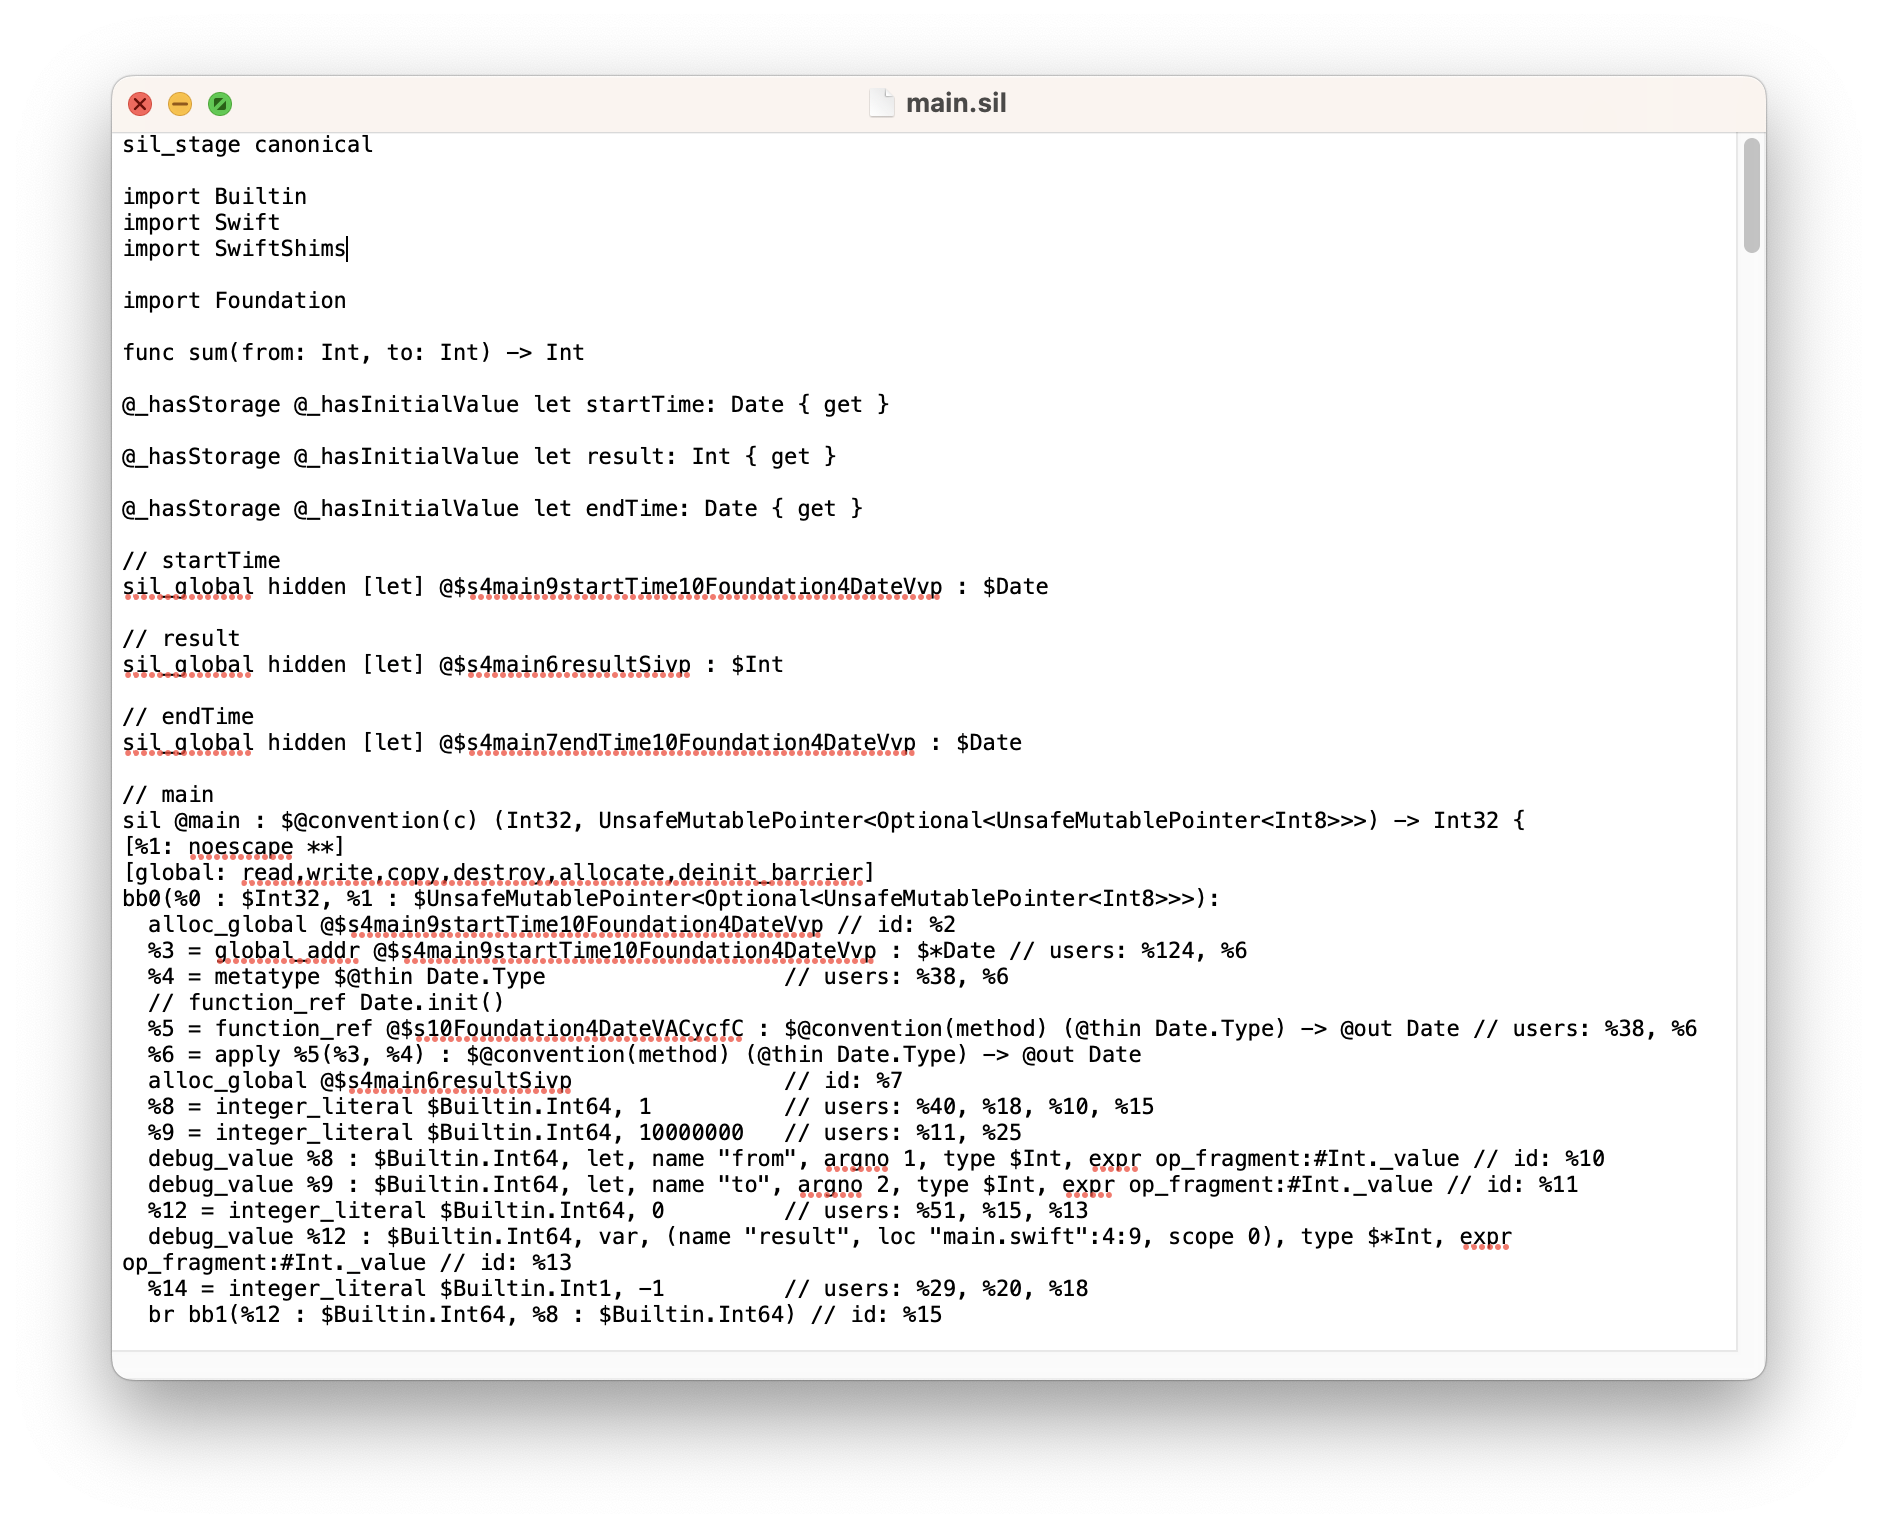
You can use the -emit-sil flag with the swiftc command. This will output the SIL (Swift Intermediate Language) code generated by the compiler, which is a human-readable representation of the Swift code that has been optimized
swiftc -O -emit-sil main.swift -o main.sil
swiftc -Onone -emit-sil main.swift -o main.sil
You can see the main.sil file. Let’s open it using TextEdit
Now we can see the details by checking sil file. If you want to learn more about it visit here
Conclusion
I wanted to test how Swift’s optimization levels work, so I used the -emit-sil option to generate an SIL (Swift Intermediate Language) file. This file serves as a bridge between the Swift source code and the machine code, and allows the Swift compiler to perform optimizations such as dead code elimination, constant folding, inlining, and loop unrolling. By inspecting and analyzing the SIL file, we can better understand how the Swift compiler is optimizing our code. Additionally, SIL can be used for debugging purposes since it provides a more detailed and low-level view of the generated code compared to the original Swift source
Notes This blog post has been edited using ChatGPT to refine some of the sentences
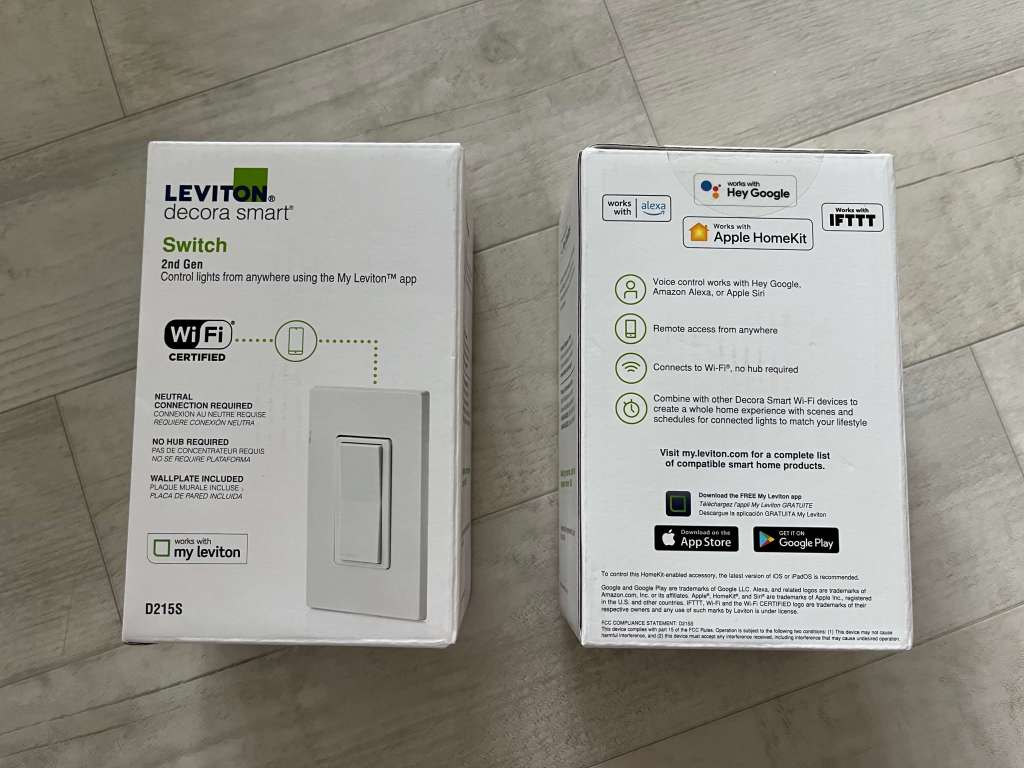
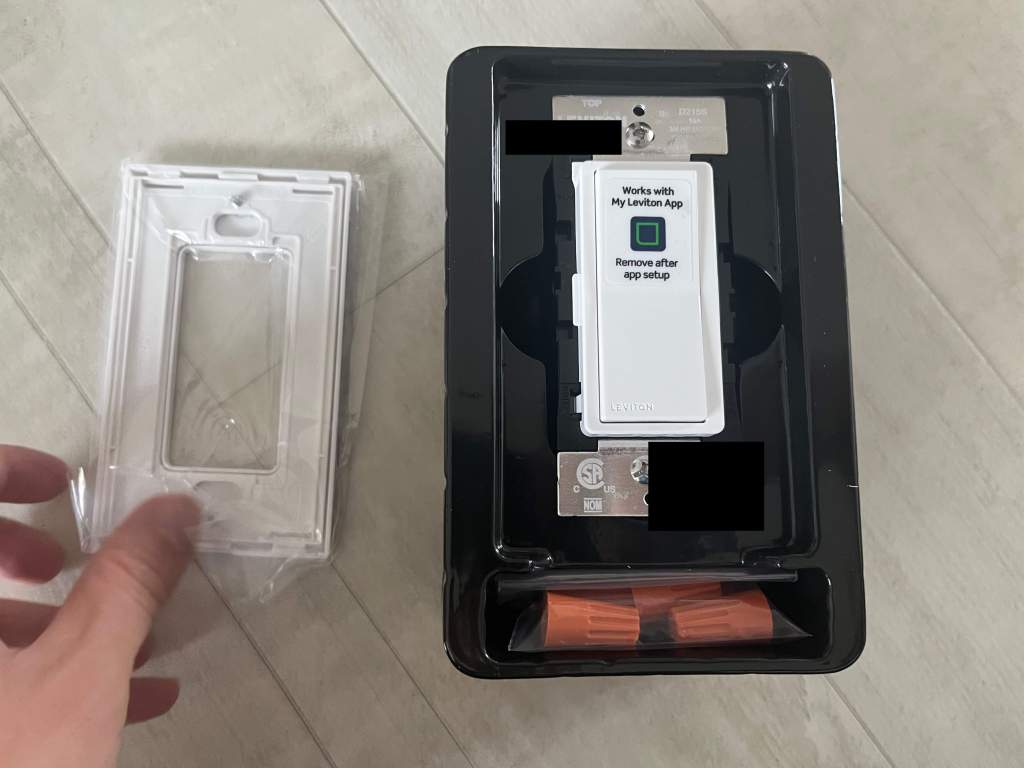
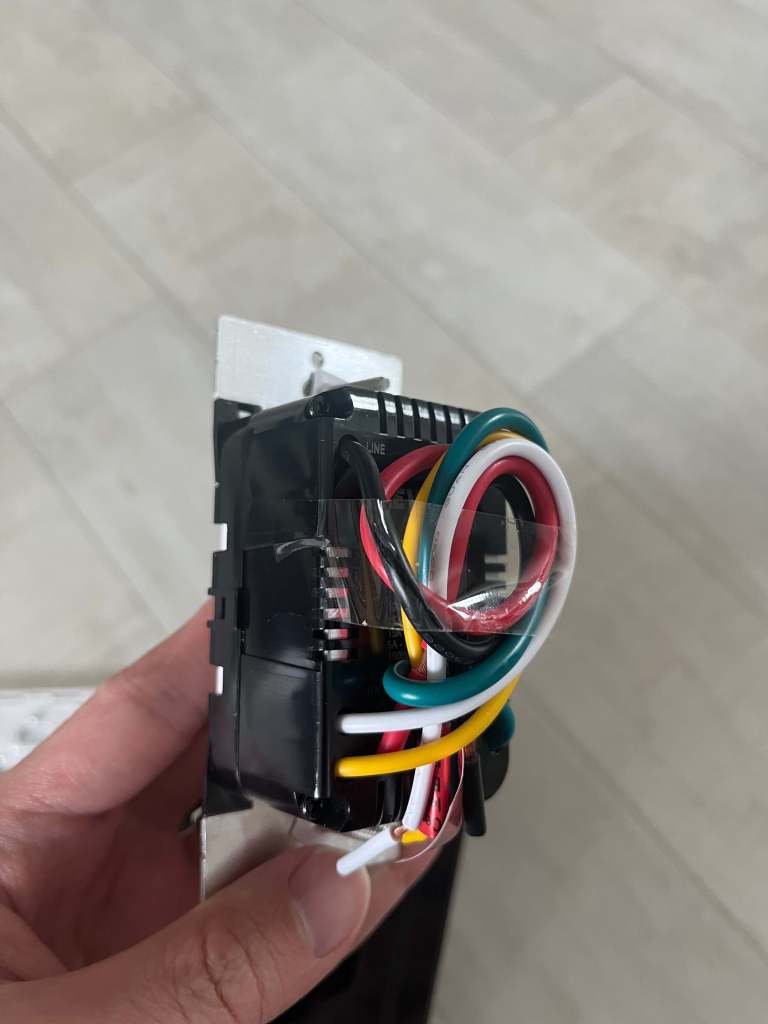
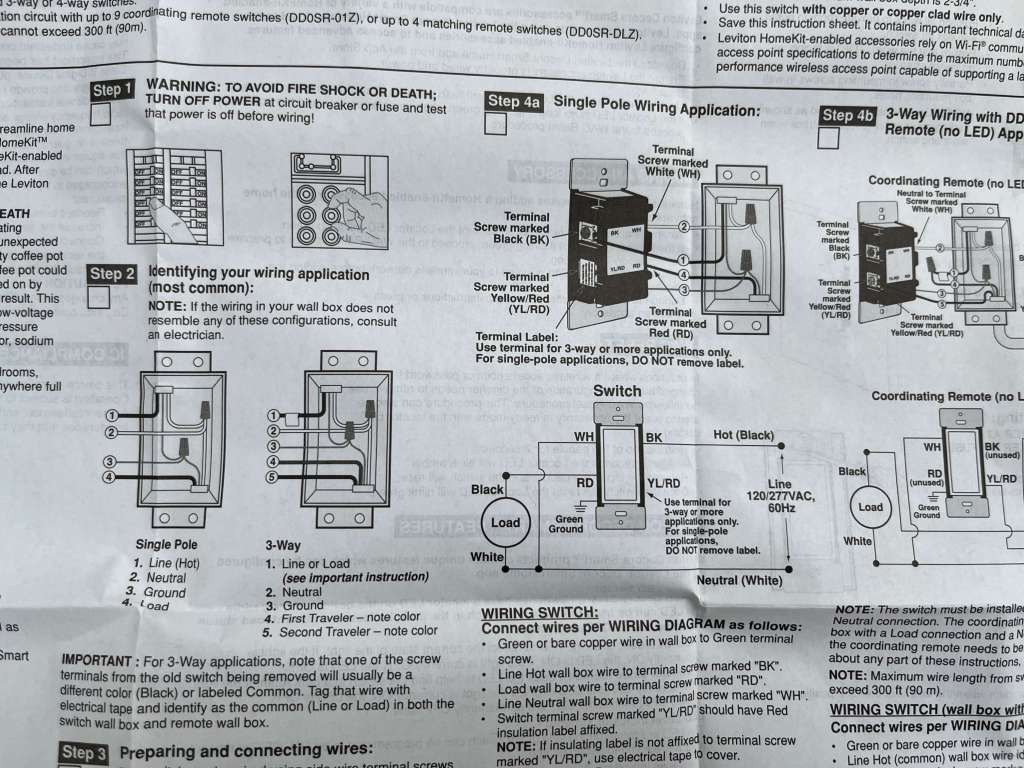
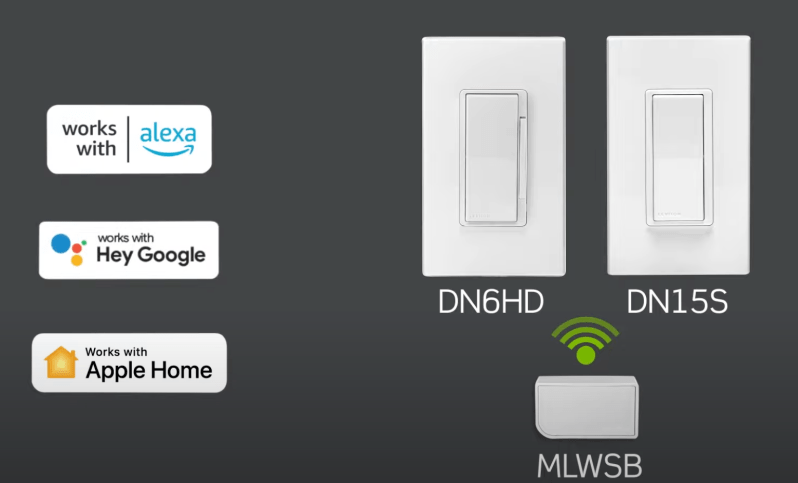
한국에서 애플 홈킷 지원하는 스마트 스위치를 사용하려면 중성선이 필요했다. 나도 이걸 써보고 싶어서 전기공사하시는 분을 불러서 스위치가 있는 곳마다 중성선을 설치했다. 하지만 최근에는 Leviton에서도 중성선 연결이 필요없는 스마트 스위치를 출시했다.
앞으로는 중성선 없는 스위치 제품들이 대세가 될 것 같다. 설치가 훨씬 간편하기 때문이다.
중성선 없는 제품에 관심있는 분들은 여기를 참고해보면 좋을 것 같다. 모델명은 NO-NEUTRAL SWITCH, DN15S-2RW 이다. (단, 애플 홈킷에 바로 등록이 되는 제품인지는 아직 확인이 필요하지만 제품 설명에 Working with Apple Homekit이라고 적혀있는 것을 보면 분명 등록될 것이다)
다음번에는 중성선 없는 스위치 설치 및 사용 후기로 찾아오겠다. 아무튼 애플 유저라면 애플 홈킷으로 스위치를 컨트롤 하는 것이 얼마나 편한지 써보면 알 것이다. 강추!


You must be logged in to post a comment.