This post is concise, but useful to represent the formatted address from CLPlacemark. The CoreLocation provides the location information called CLPlacemark, which is similar to Google’s Geocoding API.
CLPlacemark has location pieces of information like a region, time zone, name, thoroughfare, country, etc. Although it supports these pieces of information, You may not find the formatted address property in CLPlacemark. You can get a formatted address using the Contact framework. Let’s make it possible.
import CoreLocation
import Contacts

extension CLPlacemark {
    var formattedAddress: String? {
        guard let postalAddress = postalAddress else {
            return nil
        }
        let formatter = CNPostalAddressFormatter()
        return formatter.string(from: postalAddress)
    }
}
Conclusion
Before knowing the CNPostalAddressFormatter, I built the formatted address by checking the region, country, etc. Apple’s built-in formatter is cool. You can easily represent the human-readable data not only addresses but also measurements.
I attended the try! Swift Tokyo 2019, which is my first attending iOS conference. I was very excited. I’ll share my experience with that.
Before I decide to attend the conference, I asked myself why I should go there? Because All of the conference videos will be upload on Youtube.
I thought If I go there, I can meet iOS engineers from the world by talking about iOS topics, and also I can ask about the presentation. Also, I can travel the Tokyo and visit the Shinjuku LINE office. That thing makes me attend the conference.
First Day
Conference Hall
They prepared the T-Shirt and Bag for attendees.
try! Swift held on for three days.
Hello Firebase!
Wow, 900 attendees!
Sponsors.
He talked about server-side swift.
He talked about Cocoa Binding.
During the schedule, each session was usually presented for 20 minutes, and the lighting session was performed for 10 minutes.
Break Time
I was ashamed to say, Hi. But I tried networking while taking a break time. 😅
Barista gives us such great coffee every break time! It’s free. ☕️
I’ve been working at LINE 😁
Dinner
After the conference, I met iOS engineers from Korea. My coworker invited me to join the dinner. There are so many tasty foods.
Cherry Blossom was so beautiful.
I met such great engineers who are working in Seoul.
Second Day
In the morning, I visited the Maruyama Coffee to eat breakfast. I highly recommend this cafe.
Maruyama Coffee
The second day started at 9:00.
IBM Kitura
He made a presentation about Kitura.
Lunch Time
I had lunch for an hour and a half. I chose the lunch box. After I ate lunch, I went to a cafe near the conference hall. It took about 5 minutes to walk.
While having a break time with coffee, I checked the conference slack channel. Someone wrote in a Slack channel that they are looking for people to go to see cherry blossoms. Slack was good at networking with attendees. 😀
Party
I had a great time at the party. There were almost 900 iOS engineers!
I talked with peoples while waiting in a row to pick some foods.
Salmon was tasty.
Third day
I attended ‘Build a Cloud-Native Swift Backend.’ It’s an IBM Kitura workshop.
It was great. I learned Docker, Kitura, and PostgreSQL.
Hello Kitura!
Peer Lab
Sponsors rent their offices for Peer Lab. Peer Lab was networking time.
Attendees brought MacBook and introduced who I am. I also introduced my self. It was a great time. We swapped business cards with each other and made friends with LinkedIn.
LINE Shinjuku office
Giant Brown 😱
Conclusion
Everything was great! I learned new things and made new friends. Conference gave me the motivation to present my knowledge and to speak English by attending Peer Lab, Party, and Workshop.
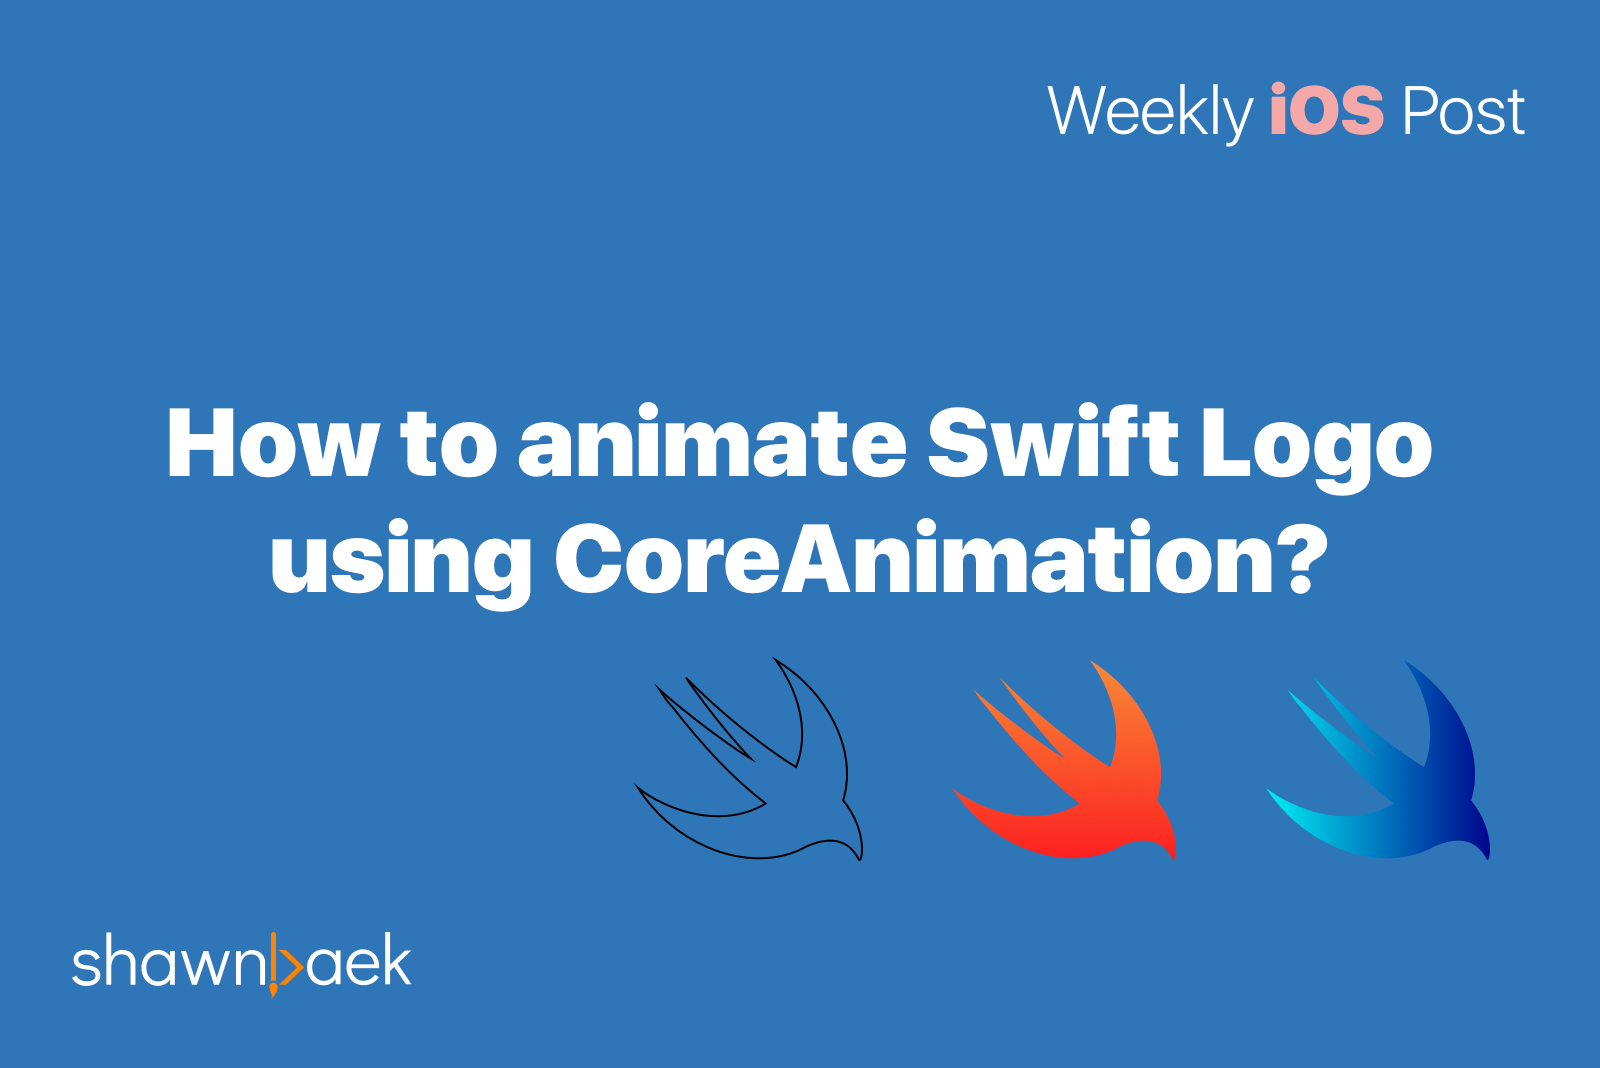
I wrote a Behind the scene of delightful animationit is about Animation patterns in modern iOS Apps. In this post, I’ll introduce how to animate path using CoreAnimation.
Before we start coding, we need to prepare the vector image like an SVG and then convert it to UIBeizierpath.
SVG Image
SVG acronym is Scalable Vector Graphics developed by W3C. Unfortunately, iOS does not support the SVG format. So We need to convert it to UIBeizierpath.
Look at thec character. The c is meaning that curveTo is a relative position. It takes 3 points, which are controlPoint1, controlPoint2, and currentPoint. I was very confused that how can it be converted from (-4.667, 2.696), (-11.084, 2.973), and (-17.54, 0.206) to (12.35, 33.25), (25.22, 35.74), and (18.8, 36.02).
Let’s look again. We take 3 points, which are controlPoint1, controlPoint2, and current Position.
The startPosition is CGPoint(x: 29.885, y: 33.05). And It was added curveTo relative to startPosition.
CurrentPosition(x: 12.35, y: 33.25) is calculated by 29.885 – 17.54 = 12.35 and 33.05 + 0.206 = 33.25
ControlPoint1(x: 25.22, y: 35.74) is calculated by 29.885 – 4.667 = 25.22 and 33.05 + 2.697 = 35.74
ControlPoint2(x: 18.8, y: 36.02) is calculated by 29.885 – 11.084 = 18.8 and 33.05 + 2.973 = 36.02
And next position is also same. Just take a 3 position and calculate it relative to currentPosition(x: 12.35, y: 33.25) which is updated after add curveTo position. Here is the full path of Swift Logo.
func startFillColorAnimation() {
  let fillColorAnimation: CABasicAnimation = CABasicAnimation(
  keyPath: "fillColor"
  )
  fillColorAnimation.duration = 1
  //Start Fill Color Animation after finishing path animation.
  fillColorAnimation.beginTime = CACurrentMediaTime() + 2
  fillColorAnimation.fromValue = UIColor.clear.cgColor
  fillColorAnimation.toValue = UIColor.red.cgColor
  fillColorAnimation.fillMode = .forwards
  //Keep color after complete animation
  fillColorAnimation.isRemovedOnCompletion = false
  logoLayer.add(fillColorAnimation, forKey: "fill")
 }
Fill Gradient Color Animation
Unlike SVG, CAShapeLayer doen’t support gradient color. So We should use CAGradientLayer to fill the gradient color in Swift logo. I’ll show you how to change the gradient color from original orange gradient color of Swift logo to blue gradient color of SwiftUI logo.
I had presented about iOS animations at LetSwift conference last year. I classified the animations by researching the modern iOS app. There are 4 modern animation patterns.
Launch Animation
Loading Animation
View Transition
Interruptible Animation
Before look at the animation patterns, Let’s take a look principle of animation. This principle is helping you when to decide the easing functions on your animation code.
The principle of the animation
The Illusion of Life: Disney Animation
In 1981, Frank Thomas and Ollie Johnston define the twelve principles of animations. I select the 4 principles which can reflect UI animation. These principles affect the easing functions in the Animation framework.
The core animation framework has an easing function. We can set the easeIn, easeInOut, easeOut, and linear with duration time. Keep in mind these principles, I’ll show the examples and guides about easing function.
The secondary action principle reflects the physics effect, keyFrame animation, and interruptible animation.
Easing functions
Robert Penner is the creator of the easing function. It is widely used in various programming languages. The easing functions are basically inspired by twelve principles of animations. Let’s look at which easing function are suitable for UI.
uber app
Look at Side Menu. The speed of showing and hiding the menu is different. Isn’t it? Here is my guide about the easing function.
Use ease-out when the view will appear.
duration 150ms – 350ms
Use ease-in or linear when the view will disappear.
duration 100ms – 150ms
Modern iOS Animation
Launch Animation
The launch animation is the first impression and gives a delightful experience to the user. Technically, an iOS app is fetching data from the server, and It takes time to show the interface. So the fancy iOS apps use the launch animations while loading data.
The loading animation displayed on the placeholder does not cover the screen, so it looks much cleaner.
I make the loading animation. I’ll post about how to make your loading animation.
View Transition
ViewTransition gives seamless experience compare to push view controller and present view controller, which is the default iOS presenting style. Technically you can implement your view transition style using UIViewControllerAnimatedTransitioning. I’ll post about UIViewControllerAnimatedTransitioning.
Interruptible Animation
You can see how Interruptible Animation works on the Apple Maps app. When you swipe up and down, then It will be starting Animation to expand the content. Interruptible Animation allows canceling while animating. Apple introduces this feature on iOS 10, and it called UIPropertyAnimator. I’ll also post about it soon.
Conclusion
I introduce the modern iOS animation styles. There are four kinds of patterns, and I’ll post how to implement these four patterns using CoreAnimation. If you want to get more information, then please look at references.
The Table is a helper function to print the tabulation data bypassing the Any data! [e.g., 1d array, 2d array, and dictionary]. I’m sure if you practice coding interviews, it helps you a lot. You don’t need to struggle for checking results using a build-in print function!
Examples
The Table can print the tabulation data. It also supports the iPad playground.
The tableInfo function return the informations of data. I use the LosslessStringConvertible protocols to get the item width by checking the characters of string.
“For example, the integer value 1050 can be represented in its entirety as the string “1050”.”
This function didn’t considering the Unicode block so far. If you set the CJK(Chinese, Japanese, and Korean) characters then table layout will be broken. I’m going to solve it by using Unocode-Box-Drawing next time.
//Declaration of print function by Apple
func print<Target>(
    _ items: Any...,
    separator: String = " ",
    terminator: String = "\n",
    to output: inout Target
) where Target : TextOutputStream
The TextOutputStream is a protocol. The String type already conforms to TextOutputStream. So If you pass the reference of String at to in print function, The output of print will be written into String.
//https://github.com/apple/swift/blob/master/test/stdlib/Print.swift
PrintTests.test("StdoutUTF8") {
  expectPrinted("µ", "\u{00B5}")
}

PrintTests.test("Varargs") {
  var s0 = ""
  print("", 1, 2, 3, 4, "", separator: "|", to: &s0)
  expectEqual("|1|2|3|4|\n", s0)

  var s1 = ""
  print(1, 2, 3, separator: "\n", terminator: "===", to: &s1)
  expectEqual("1\n2\n3===", s1)

  var s2 = ""
  print(4, 5, 6, separator: "\n", to: &s2)
  expectEqual("4\n5\n6\n", s2)

  var s3 = ""
  print("", 1, 2, 3, 4, "", separator: "|", to: &s3)
  expectEqual("|1|2|3|4|\n", s3)
}
I wrote the unit tests code by checking the result of function.
In Xcode 11, the scroll view has two new things, which are the Content Layout Guide and Frame Layout Guide.
It’s a very convenient way to set content size for scrollView.
Let’s check how to use it on the storyboard.
What is the Content Layout Guide?
It is the size of the content. For example, if your scrollView is enabled vertical scrolling only, then set the subviews constraints relative to the Content Layout Guide.
What is the Frame Layout Guide?
It is a fixed size of the content. For example, if scrollView is enabled vertical only, then just set the Frame Layout Guide’s width constraint and leave your height constraint.
How to resolve the constraint warnings?
The above steps is an essential for scrollView with its subView. However Storyboard may still complain.
To solve the constraint issue, change the intrinsic size of the scroll views subView.
Add stackView
For scrolling the contents, I added stackView with listViews.


You must be logged in to post a comment.